Back in 2021, we bought a PlayStation 5 (PS5) as our main living room console. Making the most out of this console meant we also had to buy a new TV, as our old TV was not 4K-compatible and did not support HDMI2.1, the new A/V standard required to support all of the PS5’s capabilities. Because I’m a big fan of digital art frames, like the Meural, we purchased the 2020-model 55″ Samsung Frame as our new TV.
But this has not been a particularly happy experience. One of my big troubleshooting projects in the past two years has been getting surround sound out of my PS5, through that Samsung Frame TV, to my older HDMI2.0 A/V receiver without adding lag – a delay between the action on the screen and the sound heard over the speakers. It’s so bad, that you’ll fire a gun in a game and then hear the shot more than a second later – not a great gaming experience. For unknown reasons, both when using the (optical) SPDIF out or the HDMI eARC connections, the Samsung will often either add this delay or simply drop the audio signal entirely.
Weirdly, Samsung TVs have had issues with audio output for years. If you look at their support forums, people are complaining about these issues on anything from the cheap TVs to their flagship models. And it’s not just people with older audio gear that are experiencing problems, it’s also people with the newest, top-of-the-line Sonos soundbars that cost more than their TV itself. To be fair, users of many other brands of TVs also experience an audio delay. It seems to be an issue affecting a lot of modern HDMI2.1 TVs. It’s so bad, that the general advice is for you to skip the TV entirely in your audio chain if at all possible.

Fixing this is where it gets tricky. In the old days, consoles would have dedicated audio output ports that you could use to connect to the receiver of your surround sound system without ever touching the TV. But because HDMI2.1 is designed to carry both the best video and audio quality, with more channels beyond what the old audio outputs could handle, new consoles have dropped these ports. Console makers say the modern solution is to use HDMI eARC, where the console sends both video and surround sound audio to your TV over HDMI, and you use an eARC connection to send audio from the TV to your receiver. But as we mentioned before, routing audio through the TV is what introduces lag.
As an alternative, they say you should plug the HDMI cable from your console to your receiver, and let the receiver split the audio from the video signal before sending only the video to the TV. Again, the audio never makes it to the TV and can’t get fucked up there. But here we run into another problem – if your TV is HDMI2.1 compatible and you want to make use of HDMI2.1 features, all devices leading to the TV must be HDMI2.1. If they’re not, the video signal will fall back to HDMI2.0 instead, which means you lose out on some of the reasons you bought that brand-new TV. So this solution only works if you also have a HDMI2.1 receiver. These are still quite new and the best models will cost well over a thousand dollars. So if we don’t want to upgrade our sound system, what we need is a device that can extract the audio from the PS5’s HDMI output as early in the chain as possible so we can send this to our old sound system.
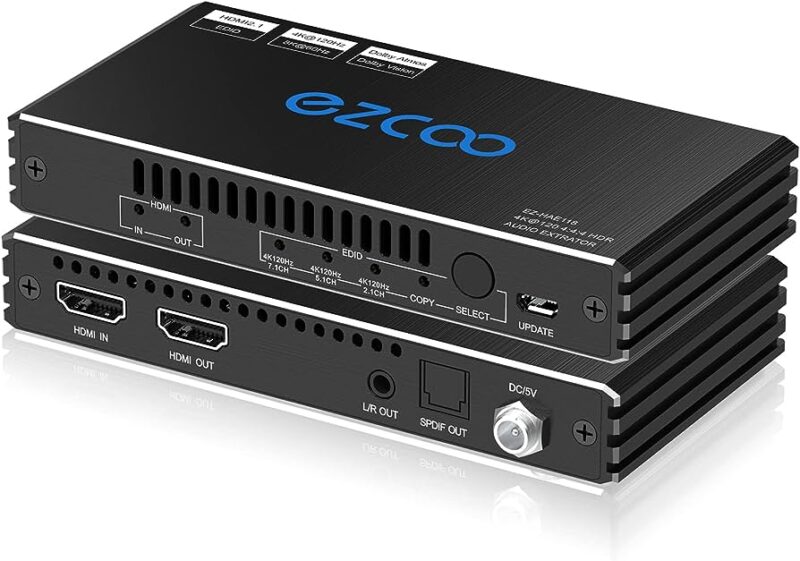
I have found a solution: the EZCOO EZ118 Audio Extractor, also sold under the brand AVStar as the HAE118 .
As you can see in Steve’s YouTube video and the comments posted there, the use case for many people buying one is slightly different than mine. They are using a gaming monitor and they want to have surround sound on their older systems or gaming headphones. But because gaming monitors (and some TVs) don’t identify themselves as surround sound devices to the PS5, these users are not given the option to output surround sound at all! The PS5 will only output stereo sound.
What the 118 does is simple: it sits between the TV and PS5 and will identify itself to the PS5 as a surround sound-capable TV. The PS5 will send video and surround sound to the 118, which it will then either send onwards to the TV or extract to the (optical) SPDIF out port, where it can be sent to the sound system or headphones. Using the EDID Select button on the front you can set what kind of surround sound device the 118 should identify as; either a 7.1 channel system, a 5.1 channel system, a 2.1 channel system, or simply a copy of what the TV says it is (caveat: no matter what you select here, an optical SPDIF cable can at best carry 5.1 Dolby sound, not 7.1 sound).
For the monitor gamers, this solves their problem perfectly. Their gaming monitor now looks like a surround sound device to the console. But this is a slightly different use case than my situation – our Samsung TV does identify itself as a surround sound device. It just won’t send audio to my receiver without lag. So as long as the 118 allows me to extract the audio to the SPDIF port before it gets to the TV, this also solves my problem. But this is where it gets complicated…
First, a warning. It turns out devices like this are very sketchy when it comes to compatibility. Many Amazon reviewers have problems with their specific combinations of consoles and TV/monitors. So make sure you can send this device back when you purchase, and give it a good test before the return period is up.
Out of the box, the 118 won’t work. You’ll need to update the 118’s firmware by getting their update software and the latest firmware from EZCOO’s site – it’s in the last link. The current firmware is version 0.99.20 and the software is Windows-only. It looks terribly malware-ish but has so far worked legit. Then again, if the Chinese secret service is now inside my computer, hi!
The firmware file comes with no instructions, just a tutorial screen-recording mp4 that shows where to click without any explanations. I’ve added it here for you to refer to. While the video is technically correct, it sure could have been a lot clearer. It’s a very messy process.
But, in the end, this worked for me:
- Power the 118 and connect to your Windows computer via micro-USB.
- Run the UARTAssist tool, which will prepare the device to receive new firmware.
- Set the COM (communication port) settings to the ones from the video: BaudR
57600, DPaityNONE, DataB8and StopB1. - Open the connection.
- Send the command to make the 118 listen to the ISP programmer (see below for further information).
- Close the connection.
- Run the Gigadevice ISP programmer, which will write the firmware to the device.
- Copy the right COM settings from the video here as well.
- Upload the new firmware.
- Close all programs.

The crucial part that does not get explained well in the video, but is noted in some other EZCOO documentation, is the command you have to send via UARTAssist. The command is:
ISP 32 1
and then a linebreak (enter button)!!!
Forget the linebreak before you hit send, and nothing happens. It means the command gets sent to the device without being run on the device. This fucked me for a long time, as I kept hitting the send button with no results.
Once the firmware has been uploaded to the 118, unplug it from the computer, move it back to your media center and connect it to your TV and console. In my case, the PS5 HDMI2.1 cable goes to HDMI In, the Samsung TV HDMI2.1 cable goes to HDMI Out, and the receiver’s optical cable goes to SPDIF Out.
Now we get to another crucial yet undocumented step: my 118 refused to send any video at all after this firmware update. Luckily, an Amazon reviewer mentioned you need to hold the EDID SELECT button until all the lights flash. Apparently, this will fix HDCP between your devices. Tada! Your TV should show video now.
Almost there, just a few settings left to go. In order for this to work with all the bells and whistles (HDMI2.1 video features like 4K@120, VRR, and HDR, with HDMI2.0 Dolby 5.1 surround sound over optical) you need to:
- Set the 118 preset to Copy. This is required for VRR, as the other device presets don’t support VRR.
- Set your TV to Game mode. This will reduce audio lag to the minimum it’s capable of.
- Turn on the settings for 120hz framerate, HDR, and VRR in your console.
- Set the audio settings of your console to 5.1 channels and Dolby format. This is the highest quality the optical cable can carry.
Assuming your TV does actually support 4K@120, VRR, and HDR all of this EDID info should be copied and properly communicated between console and TV by the 118, which you can check in the console’s video output. And you should get Dolby surround on your receiver! Mission accomplished.