My latest creation is a 3D-printed adapter for the Raleno PLV-S104 (Raleno 104) light. The model turns it into a lightbox that you can use for digital camera scanning of your negative film. It also contains a holder compatible with the Valoi 35mm/120 film carriers. Additionally, I’ve provided a blank holder that you can easily modify yourself for the film carrier of your choice. If you’re just here to download my Raleno lightbox model click the following button – otherwise, read on!

Negative film scanning
Ever since the pandemic started, I’ve been spending more time with my analog film cameras. Tons of fun, but the cost of having a roll of film developed and scanned really starts to add up. For a while I was using a local lab, which cost me €20 per roll! So, early in 2020, I bought an Epson V550 flatbed scanner. That way I only had to pay for the development and could scan the film myself. Turns out a flatbed is great for larger negatives like 120, but slow for standard rolls of 35mm. So slow, I started dreading getting negatives back from the lab, as I’d have to spend hours digitizing them.
Digital camera film scanning

I’m not alone: instead of flatbed scanning, many people recommend digital camera film scanning. You use a digital camera and a macro lens to take photos of the negatives as a way of ‘scanning’, then invert the image in software like Lightroom using specialized plugins like Negative Lab Pro. It requires a bit more hardware: the camera and macro lens, a tripod or copy stand to hold the camera perfectly perpendicular to a flat surface, a film carrier that can hold your negatives flat, and a light source to evenly light your negative from behind. But once you’re set up you can ‘scan’ as fast as you can take a picture and move the film. According to online guides a 36-shot roll of 35mm film shouldn’t take more than 10 minutes to scan.
So, I figured I could give this a shot – I already have a digital camera and macro lens, after all. My cheap tripod isn’t suitable because the center column isn’t invertable, so the camera can’t look down onto the film. But you can easily order a copy stand from Amazon or build it DIY if you have time. For the film carrier, I bought the Valoi 35mm (without the advancer unit, which only makes sense for uncut negatives). Now, I just need a proper light source. Turns out, this requires a bit more attention as it’s one of the most critical parts of the setup.
Scanning light source
If you’re going to buy a light source for digital camera film scanning it’s important to consider the following requirements:
- You want a lot of high power LEDs for a bright light. This lets you use the faster shutter speeds on the camera to avoid blur.
- It needs to produce an even, diffused light so your scans won’t have a noticeable grid pattern of LEDs.
- The light must have a high Color Rendering Index (CRI). This is a 0-100 measurement of how realistic the colors of objects lit by the light will be. For scanning the CRI needs to be above 90.
- The color temperature of the light must be neutral – not too warm or cold. Preferably, daylight balanced at around 5500°K.
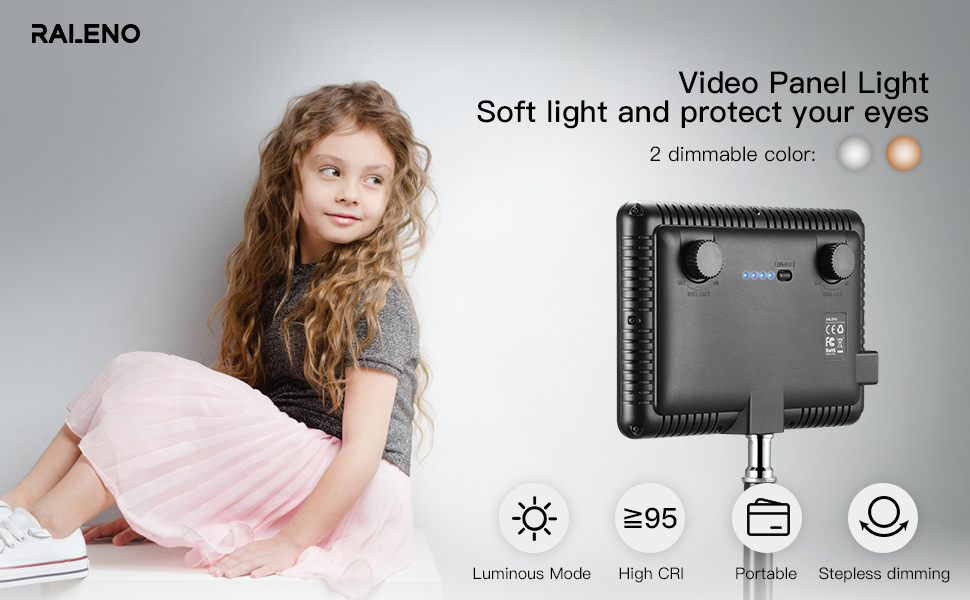
You can get light tables that are purpose-built for scanning, but they are quite expensive. Alternatively, you can buy any LED panel that happens to meet the requirements listed above. One of the more popular panels that work well is the Raleno PLV-S104. The Raleno 104 is a small light used on video shoots which Valoi recommends in their gear guide. It’s a cheap LED light that has a bright 104-LED output which produces 850 lumens, at 5600°K, with a CRI of 95 and a built-in diffusion plate to even out the light. It’s almost perfect. There’s just one problem: you can’t lay the Raleno 104 flat. Designed for tripod use, the light has two huge control knobs jutting out the back.
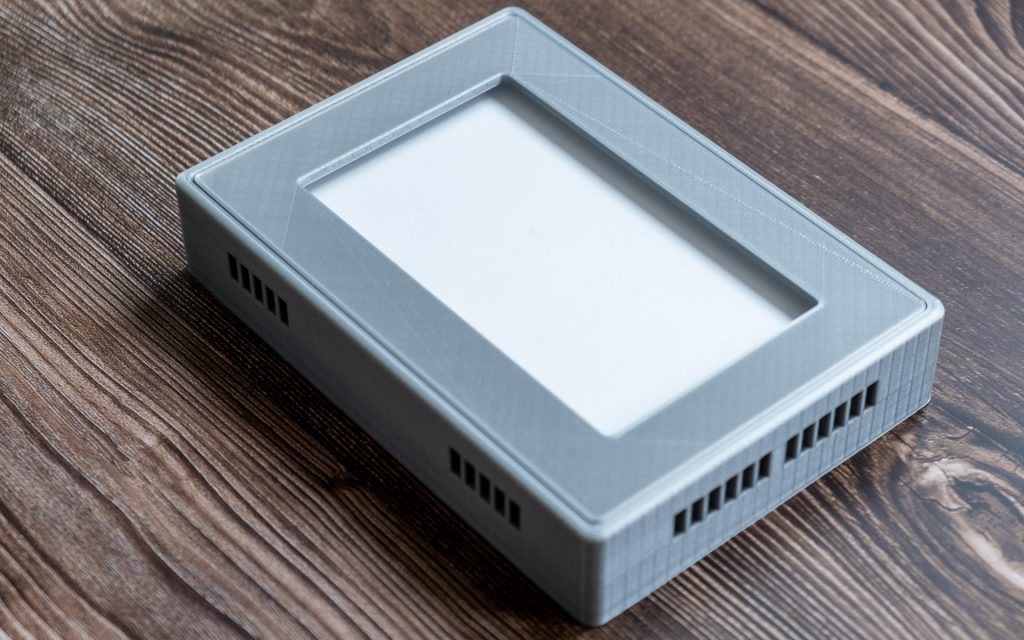
Raleno 104 lightbox adapter
The Raleno 104 not lying flat is a common problem noted on various film photography forums. Valoi even has a guide for adapting the cardboard box the light is packaged in as a workaround. But using a cut-up cardboard box is a bit of a janky solution, and I figured this was an excellent opportunity to brush up on my Fusion 360 skills. I present to you, my hard work of the past week:
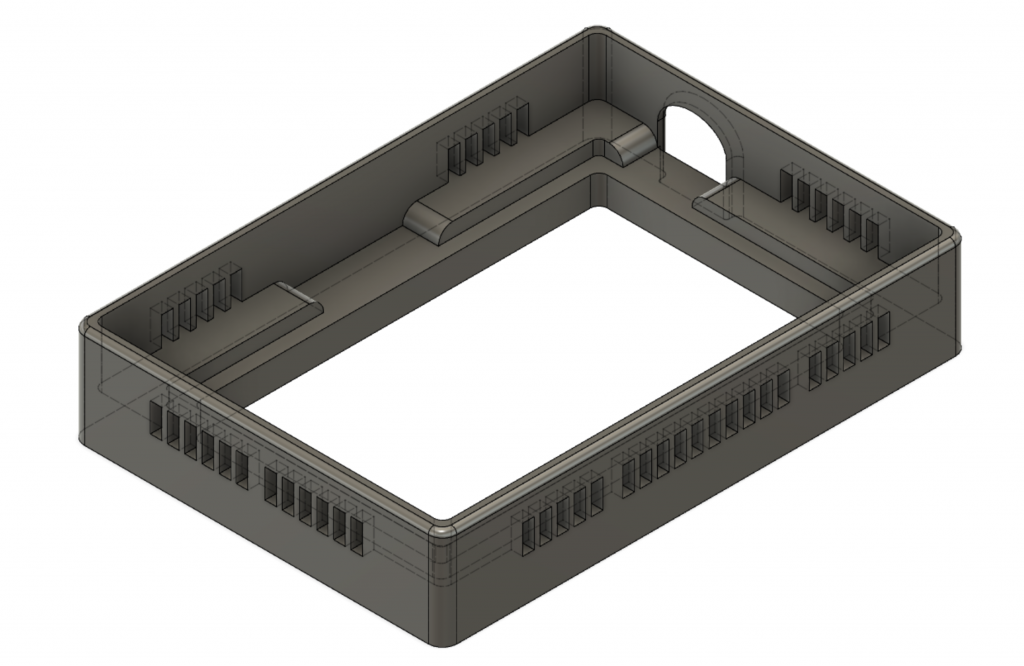
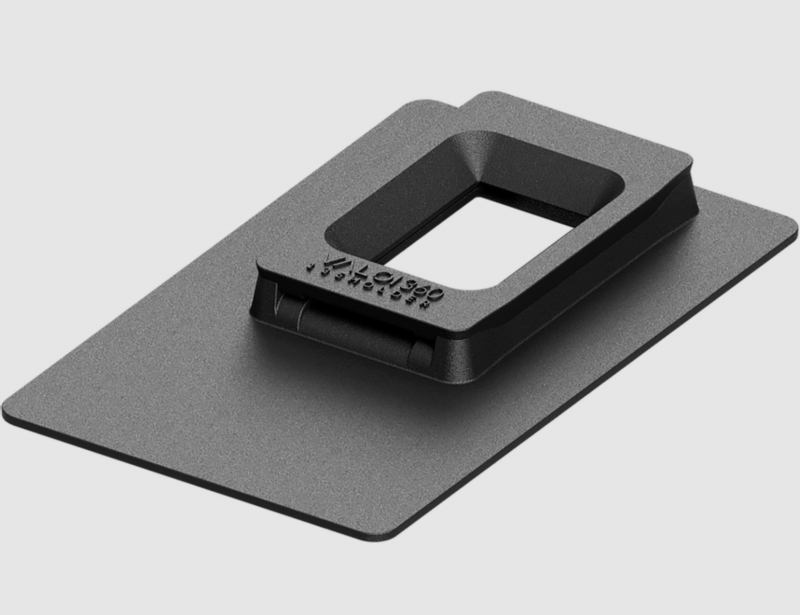
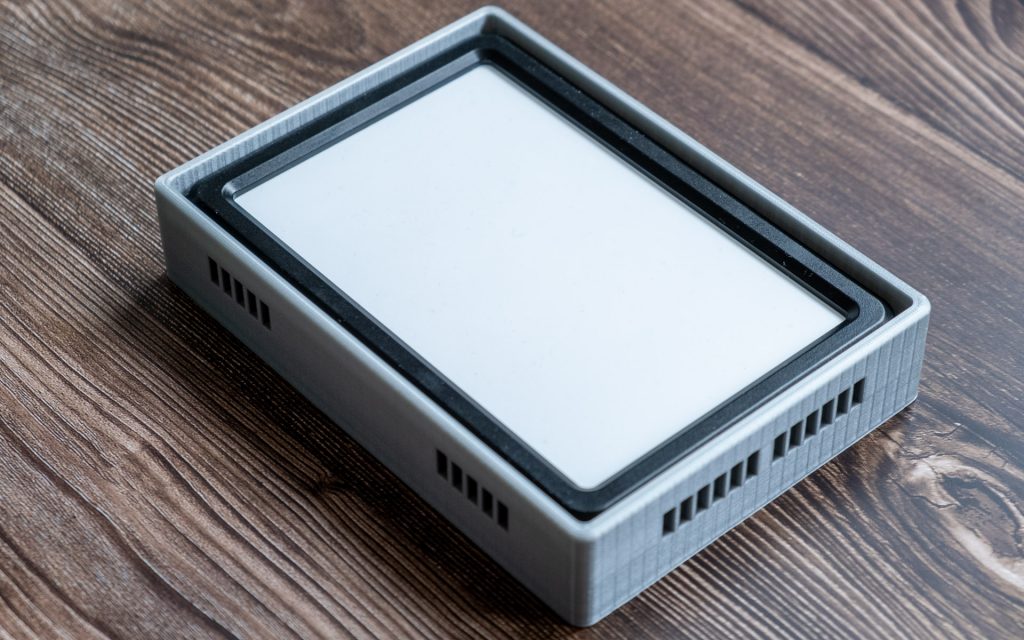
My Raleno 104 lightbox model is an adapter that fits on most common 3D printer buildplates (it’s about 18,4cm wide). It has cutouts for the controls, charging port, and tripod mount of the light. Using this adapter the Raleno will finally lie flat on your copy stand. You can still power the light with a cable and reach the controls through the open bottom of the lightbox. Air vents around the sides of the model provide ample opportunity for heat to escape. I had to add these after the Raleno got really hot during early tests. And I may have gone a bit overboard with the fillet tool to round off all the things… But that’s a standard part of learning Fusion 360, right?

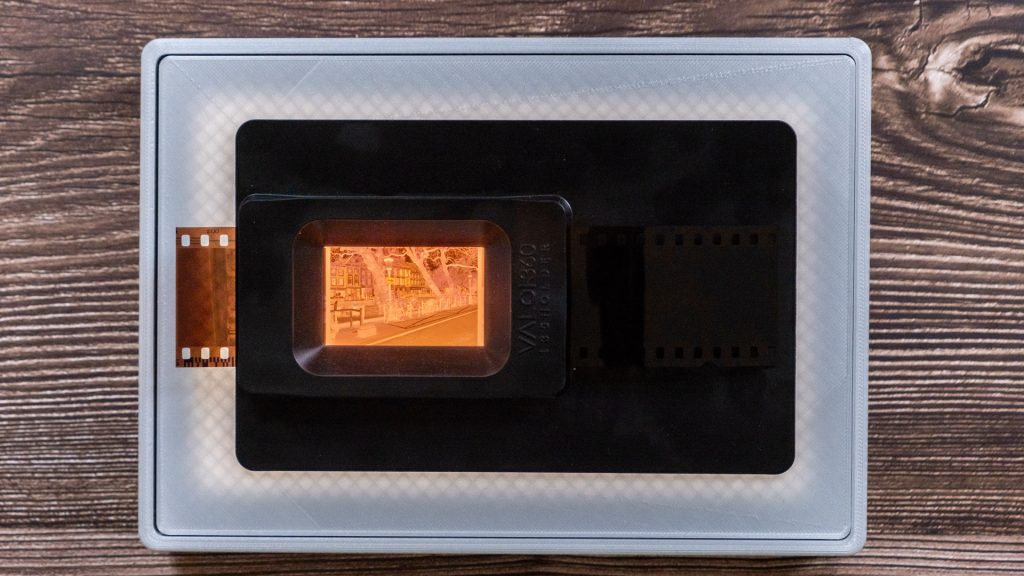
Film carrier holder
The second part of the model is a holder for the film carrier. The film carrier keeps your negatives perfectly flat for scanning. This holder, in turn, masks any extraneous light that might otherwise leak past the carrier. Light leaks can add unwanted glare or reflections to your scans. This way you’re sure you are only lighting the film in the carrier. I’ll use my Valoi 35mm film carrier, so made a cutout in the holder that fits the Valoi’s feet. It slips right in! The Valoi is sold in both 35mm and 120 film sizes, with the same dimension feet on each model. Both should fit perfectly fine in this holder, though I have personally only tested the 35mm version. I’ve designed this only for the film carrier itself, not for the film advancer Valoi also sells.

It’s not a perfect solution, because 3D-printed plastic is not automatically fully opaque. Especially when using default layer height and infill settings in most slicers! Your holder will probably let some light through and reveal the infill pattern that you are using. Annoying, but most glare is still cut and I don’t think the rest actually affects your scans. And even when printed at 100% infill there is no guarantee your holder will be fully opaque. If you want to make sure no light makes it through it’s best to apply an opaque material to the bottom. Electrical tape would be a good candidate.
Modifying the holder for other carriers
Valoi is not the only brand selling film carriers – many people use products from Negative Supply, Essential Film, Lomography, Kamerakraft, etc., or print models they found on sites like Thingiverse. I don’t own any of these other brands, so I can’t design a holder for them. However, I did provide a blank version of the holder that has no cutout yet. This makes it easy for anyone to modify the holder to fit their film carrier of choice. This can be done in even the simplest of modeling software (e.g., Tinkercad – just import the blank and refer to this lesson on making holes).
I hope this lightbox adapter is of some use to other analog photography geeks out there! So definitely let me know about your experiences, questions and any suggestions you might have in the comments. You can get the model here:
Hello! I love the idea, it’s just what I need! I plan to get it print by a lab or someone with a 3D printer.
I have the raleno V116, so it wont fit this model but I was wondering if it would be hard to just adjust the size of this model? I don’t own 3D printer and never design anything on 3D software
Thanks:
Thanks! I’m afraid that this model was custom designed for the 104 light, designed and fitted to the one I have step-by-step, and if I look at the pics the 104 probably doesn’t share any dimensions with the 116 light. Adjusting the model would probably be more work than designing a new one for the 116.
Thanks, I used it to create my scanner by remixing two of your ideas !! You have been a teacher to me! Thanks