Waxed canvas camera bags have become an incredibly popular way to carry your camera. The black nylon monstrosities that are the norm for camera bags everywhere are functional to carry a camera from A to B, but won’t get you any style points. On the other hand, the brands that have traditionally paid attention to looks, bags like Crumpler for example, are quite prone to theft – if you see one you know there’s an expensive camera in there. So it’s nice that the waxed canvas camera bag look, from producers like ONA, walks that perfect middle ground between being both stylish and still looking like a normal messenger bag.

Waxed canvas is an old method from the early 1920s to make fabric water-resistant, by treating it with a wax compound. The technique was originally developed in shipyards for use on sails but was later picked up by brands such as Barbour, Filson, and Belstaff to create clothing and other products that were appropriate for country life. In this way, waxed canvas became associated with activities such as hunting and riding motorcycles. The wax makes the fabric more rigid and gives it a typical look as it collects this very specific, aged, wax patina. The popularity of this look has caused waxed canvas to become popular again in recent years with brands that want to add a stylish heritage vibe to their products. But because waxed canvas has been superseded by newer technology in the past century, it’s no longer a commonly produced material. This means any brands creating waxed canvas products in this day and age will be quite expensive, simply because the base material is.
But if the expense in a waxed canvas camera bag is the waxing of the fabric, what if we did this ourselves? Could we DIY our own waxed canvas camera bag? A little googling and it soon became clear that we could:
- Various webshops sell cheap messenger bags that, on the surface, look quite similar to the fancy messenger bags ONA sells: the same kind of cotton canvas, leather trim, and copper-colored clasps.
- You can buy padded inserts to convert any normal bag into a camera bag.
- It’s common for outdoor shops to sell wax so you can (re-)wax your own products.
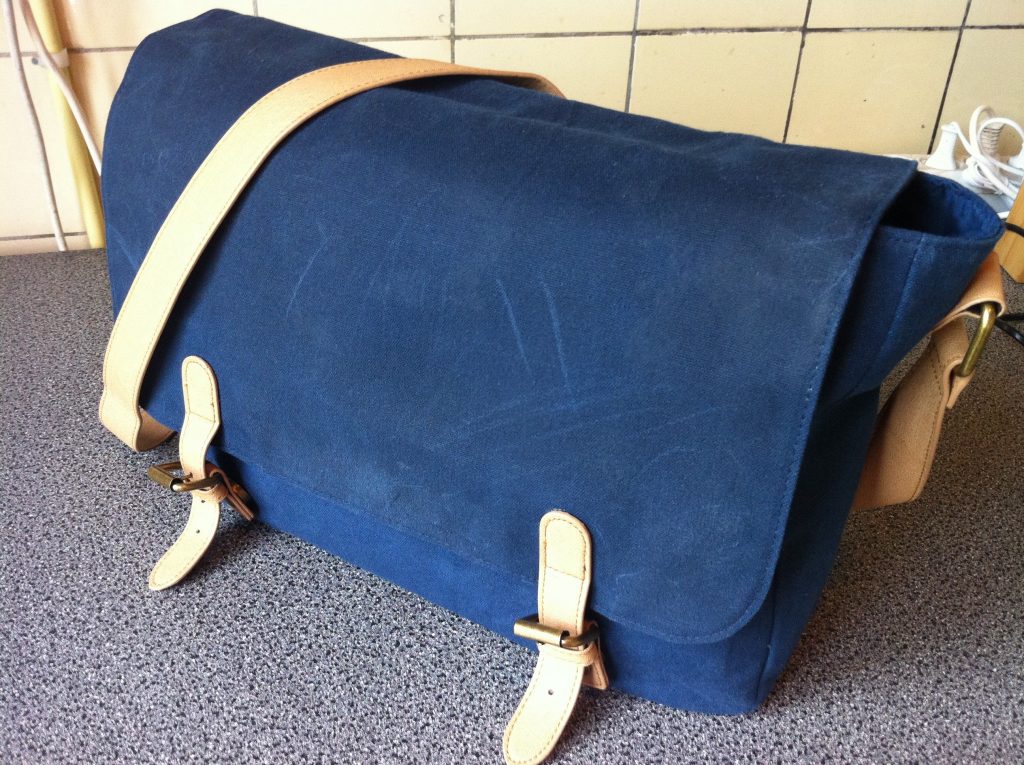
So, there are just 4 steps: buy a messenger bag, buy a padded insert, buy wax, and wax the bag – done. And really, it’s that easy! I grabbed this blue bag from ASOS with tan leather and copper-colored clasps as our bag to experiment on:

At just 20 euros this was no great loss if the experiment didn’t work out. It’s good to realize right now that waxing a fabric will make it several shades darker, so this medium-dark tint of blue will become dark blue when we’re finished.

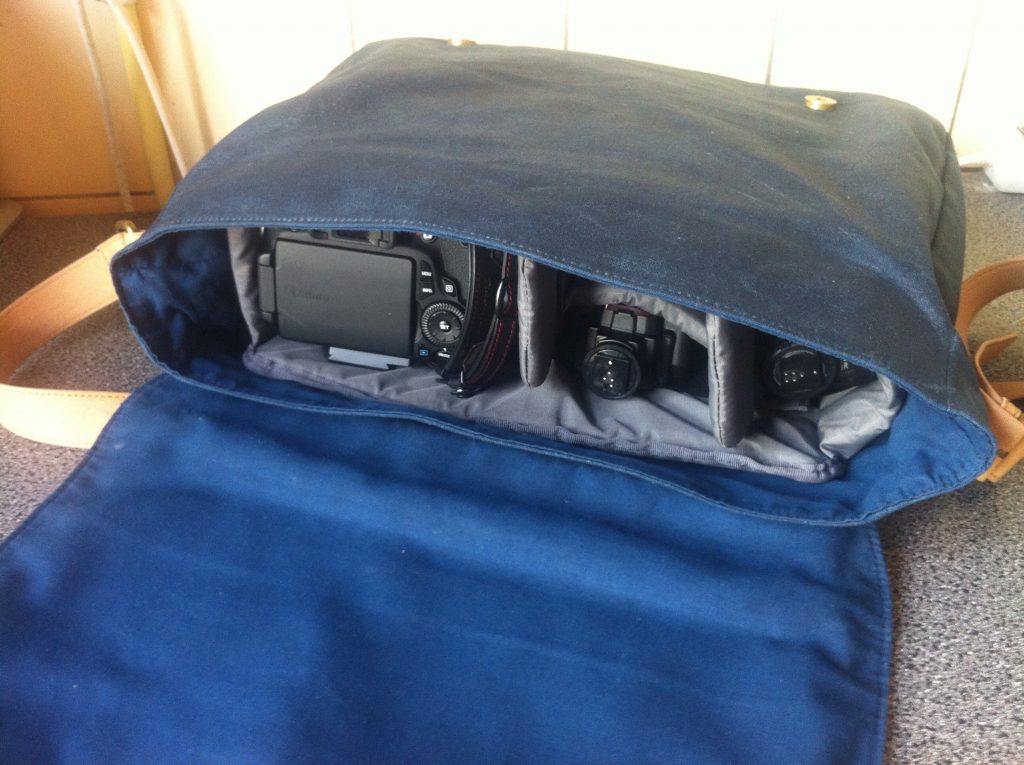
I still had a camera insert from a previous project from the brand Tenba, but any padded camera insert of the right size will do. As long as your camera insert fits roughly into your messenger bag, it will work fine for this DIY. As you can see, the Tenba fits perfectly in the ASOS bag.

The cheapest way to get fabric wax is to blend your own, there are countless recipes for this you can find on the internet that involve mixing paraffin from candles with oil and other ingredients. But learning how to make my own fabric wax was quite out of scope for this experiment. Instead, I wanted a product that was ready to go straight out of the box.
The best choice for something like that is Otter Wax. The biggest advantage is that it comes in bar form and does not need to be melted for use. Instead, you can rub the wax bar, which is about the same size as a bar of soap, directly onto the fabric you want to wax. This is much easier for this experiment than even the ready-to-use wax you can buy from brands like Barbour and Filson, where you still need to heat the can of wax over a fire to melt it and then apply it onto your fabric with a brush.
So I went to work! As you can see in my timelapse video above, the process is actually quite simple. All you need is your bag, the bar of Otterwax and a hairdryer. Rub the bar over part of the fabric until a decent coat has been applied, then use the hairdryer at a medium temperature to slowly melt the wax into the fabric, then repeat until you’re done. You’ll see the color of the bag change as the wax melts and is soaked into the fabric. And as you can see in the timelapse it takes some time, but there’s something very zen-like about doing it.
We’re left with a good first coat, but it doesn’t quite have that typical waxed canvas look. It does pick up scratches, and the fabric feels heavier and less flexible, but it has a far duller look than the waxed canvas bags I had in mind. I suspected that using the hairdryer had made the wax penetrate deeply into the fabric, fully impregnating it and making it extremely water-resistant. But because all the molten wax had been sucked straight into the fibers of the cotton canvas, it did not retain that top-level layer of wax that results in the typical waxed canvas sheen.
I figured we could fix this by applying a second coat of wax, only this time we wouldn’t use the hair dryer to melt the wax into the fabric. Instead, I spread the bar onto the bag with long, broad strokes. Then, I used my fingers to rub the wax with circular motions on the fabric, spreading it out to create a thin but consistent wax coat that lay on top of the fabric.
Because this top wax coat reflects the light differently, it’s quite easy to see if you’re missing any bits simply by holding the bag up to the light and checking for dull spots. Keep reapplying wax until the entire bag has the same consistent sheen on all sides. Once the second coat has been applied your bag will have a darker color that reflects the light quite strongly and feels tacky and moist all over.
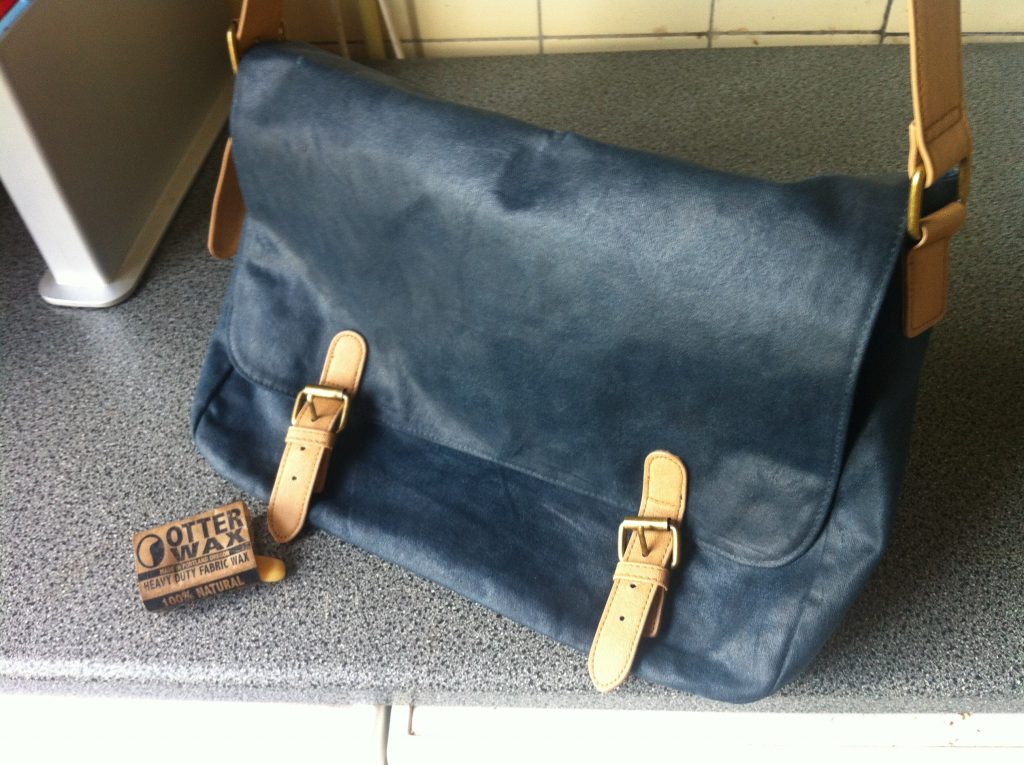
According to the Otter Wax instructions the next step is to let the wax cure into the fabric. This takes at least 24 hours, and you can speed the process up by throwing the bag into the freezer. Once the wax is initially cured, you’ll find that the wet sheen goes away and the tacky, moist feel should also be greatly reduced. Any remaining feelings of tackiness of the fabric should disappear over the next few days as the wax fully sets. The fabric now has a definite waxed canvas look to it, not as wet as the freshly coated bag looked but not as dull as after the first coat either.

That looks quite pleasing! And of course, we have to immediately try it with the camera insert as well, to see if this was going to work out as a camera bag:
Super. Now, the whole point of making a waxed canvas camera bag wasn’t just to make it look cool – though that was a very important part of it – it was also to treat the fabric to be actually water-resistant and protect the cameras that were going to be put into it. So let’s give the bag a quick splash of water in the sink:

Awesome! The drops of water pool on top of the fabric and roll off it, not getting into the bag at all. So it’s definitely water-resistant enough to survive a light splash of rain. But how would it deal with getting drenched?
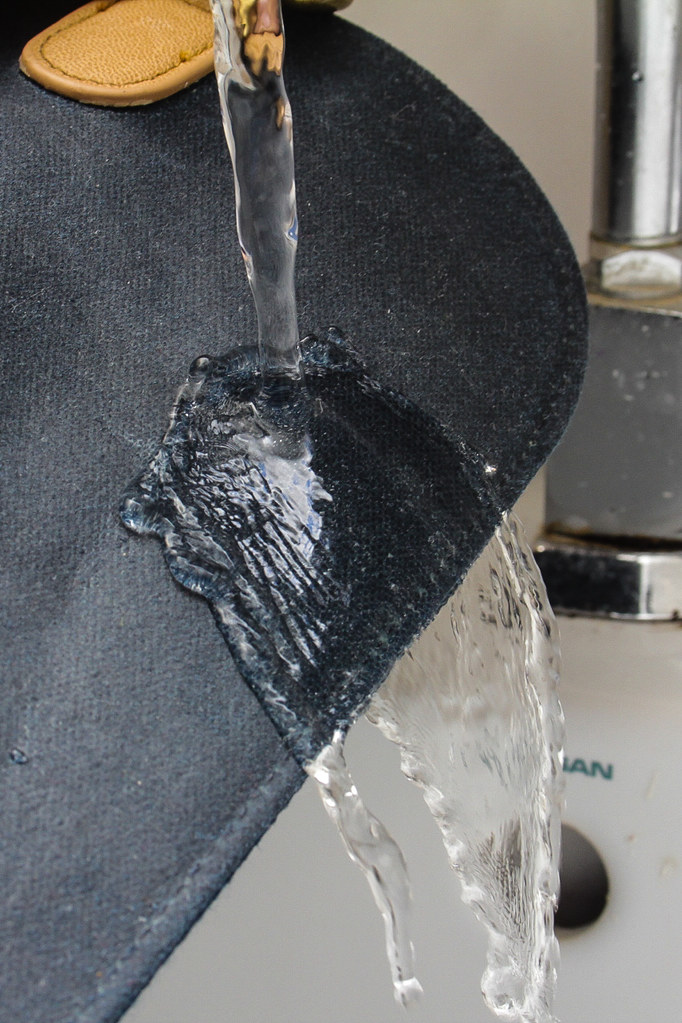

Even when we keep the bag under the running faucet, the water just runs off it and doesn’t soak into the fabric. It seems the first coat with the hair dryer did its job well – this canvas has been treated perfectly. And after a few weeks of use, you start seeing that typical patina that waxed canvas bags start to develop – the daily wear and tear slowly making their own patterns in the wax topcoat, evolving its looks into your own, personal bag.


Not too bad for a cheap DIY project! Give it a go, you’ll find it’s much easier than you would think.