For the last month, I’ve been experimenting with making a digital art frame based on color epaper. Spectra 6 is the latest color epaper tech available, offering 6 colors (black, white, red, green, blue, yellow) in brighter and more saturated tones then its predecessors. And with these color panels becoming more available and affordable now, a LOT of companies are currently jumping into the epaper digital art frame space, ranging from big players like Switchbot to startups like Bloomin8, Galari, and Paperlesspaper. But what if you want an art frame that works with Home Assistant, out-of-the-box? Let me show you how to make one, using a Seeed Studio reTerminal display, that fits into a standard IKEA picture frame!

Full disclosure: I work at the Open Home Foundation, the non-profit that owns and governs Home Assistant, ESPHome, and other projects in the open home ecosystem. My opinions on this blog are my own and do not reflect the views of the Foundation. Any recommendation of products here is of a personal nature and does not signal approval by the Foundation.
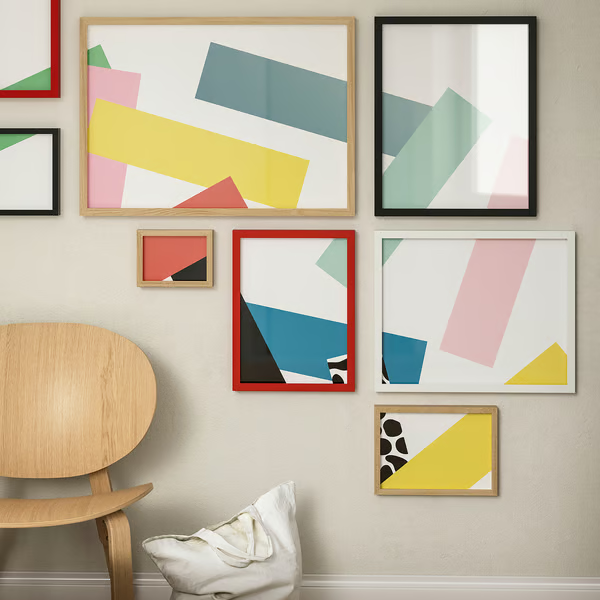
As an avid photographer, I’ve long been a fan of the concept of digital art frames. I own two Netgear Meural Canvas frames (and maintain the HA-meural custom integration for Home Assistant) and have owned a Samsung Frame before (hated it). The problem with these types of art frames is that they are built around LCD monitor panels, and ultimately always look like big screens in your room. What I actually want is digital art that looks like a real painting or a framed photograph – something that does not project any light, doesn’t have power cables running to it, and looks perfectly natural in the ambient light of the room. Epaper promises to be the solution for this, especially now that the technology is widely available in color!

Quick recap: Epaper panels are made out of tiny capsules filled with charged, colored particles that move with an electric field. Because the capsules don’t give off light like a screen, they mimic the look of ink on paper. And the particles stay in place once moved, so the panels don’t need continuous power. This is what made the tech so useful for ebook readers, and why we’re interested in it for art! So let’s get started…
What you need
| What | How many | Where |
| Seeed Studio reTerminal E1002 | 1x | Seeed Studio |
| IKEA RÖDALM 13 x 18 cm frame | 1x | IKEA |
| 3D-printed frame spacer | 2x | Thingiverse |
Seeed Studio reTerminal E1002

While I enjoy some DIY and am not afraid of a soldering iron, the core of this project is actually an already finished product: the Seeed Studio reTerminal E1002 ePaper display. This is one of the nicest color epaper devices I’ve ever held, with the newest color epaper panel, a really solid metal case giving it heft, and a battery already built in. Out of the box it fits perfectly in any modern, minimalist desk setup without needing any customizations – in fact, if you don’t want this to look like a framed picture you could run my code and just use it as-is on your desk.
The E1002 is based on an ESP32-S3 chip, which means it can run ESPHome. And if it can run ESPHome, we can set it up to work with Home Assistant! In fact, Seeed Studios probably knows that a significant part of their audience wants to do this, as they’ve put some great ESPHome guides up on their site. It was very easy to experiment with this display, simply because every component of it was documented for use in ESPHome already.

The epaper panel Seeed uses is a 7.3″ Spectra 6 screen, with support for 6 colors, and a 800 by 480 pixel resolution. Let me start off with a bit of a downer – personally, I don’t believe this particular combination works very well for photography. Epaper does not support the same color depth as an LCD screen, because each pixel can only be one of 6 specific colors: black, white, red, green, blue, or yellow. This means that the range of all others colors we can see can only be achieved by very rough mixing of pixels in a process called ‘dithering‘ – and even then, there are many colors that the display can’t accurately display. Displaying saturated purple tints, for example, is a known problem for Spectra 6 technology in general.
For the kind of photography I enjoy, this lack of color accuracy and loss of detail means the final result deviates too far from the original photographs for my liking. However, for illustrations and other drawn art, the effect is not as noticeable until you get really close to the frame! And, of course, everyone’s tastes can be different. Many people are using these smaller Spectra panels to display photos of their family or other favorite moments, and have no issues with it at all. If you want to show off your photos on this device, don’t let me stop you.


A refresh of color epaper takes about 15 seconds (black-and-white epaper takes a few seconds, in comparison), during which the screen flashes repeatedly as it pushes the colored particles backward and forward until they resemble the image you want to display. This means that color epaper is not great for use-cases that require fast refresh rates or rapid movement on screen, but that’s not a problem when we’re just displaying art. If you change the image once every night, you would have a new image to appreciate every day without ever seeing the flashing screen.
Dithering is built into a variety of tools you can use, including Photoshop and ImageMagick, but my preference is to use EPDOptimize. This is an open source tool that the guys at Paperlesspaper have created, that can dither using realistic color palettes for epaper panels. This is useful because most dithering tools use an idealized default palette, where the colors red, green, blue, and yellow are each represented as the perfect, maximally saturated version of that color. However, the actual color particles in the Spectra 6 screen are not close to those perfect versions, and the dithered colors mixed with this palette will deviate heavily from the colors you actually see on your display. The people at Paperlesspaper used lab tools to measure the colors on their physical Spectra 6 screens and figure out what their realistic values are. So, dithering using EPDOptimize will get the colors you see in real life, on the display, the closest to the original image you converted. Once dithered, the tool sets the color palette in the output image back to the idealized colors the epaper screen expects to receive. For amusement, you should view these images on your regular monitor. It will look like it’s using completely wrong colors – but it will look great when that same image is displayed on your epaper device.


The tool does come with potential for some negative side effects. Because the realistic palette EPDOptimize uses is less saturated than the pure colors normally used for dithering, some color tones simply can’t be represented using that palette, leading to smearing and flat color areas in the converted image. For some images, it can actually be more aesthetically pleasing to convert using the normal idealized palette. The colors will be less realistic on your display, but you won’t see that smearing, which can be very distracting.
The E1002 comes with a 2000 mAh battery built in, which charges over USB-C, which can be combined with another cool aspect of ESPHome: the deep sleep capabilities. This means the device can be set to wake up once every few hours, change to a new image, and then go back to sleep. The E1002’s battery runs down in a day, maybe two, when used continuously. But deep sleep can save enough power to keep the frame running for weeks on end! That means this frame can hang on your wall without having an ugly power cable hanging from it. Just take it off the wall and recharge the battery once every few weeks.
IKEA RÖDALM frame
Originally, I wasn’t even planning on putting the E1002 into a picture frame. But then I discovered, while reading the Dan’s Garden article on the E1002, that the device is almost drop-in compatible with the affordable RÖDALM line of IKEA frames. The RÖDALM comes in a variety of finishes and sizes, but the one you want for this project is the 13 by 18 centimeter version. This size is available in black, white, red, and oak wood finish. For this post, I’m using the oak finish which cost me just 4 euros.

The RÖDALM frames come with a transparent plastic front cover, a white cardboard mat (or passe-partout), a white plastic spacer, and the rear backing board with an easel hinge and sawtooth hangers. Throw out the plastic cover and spacer, you don’t need those. Instead, take the frame, put in the mat, and then put the E1002 directly on top of it. The device still has some wiggle room inside the frame, but you can either 3D-print spacers to fill that space, or you just wing it and clamp down the backing board directly onto the E1002. The device stays pretty well sandwiched in place if you do so, even if it’s not a very elegant solution.
The shape of the spacers needed for the frame was not particularly difficult, so I modeled them quickly in TinkerCAD – it takes longer for Fusion360 to start up then it takes to model this shape. The file has been uploaded to Thingiverse and should work on any consumer 3D printer. Print two pieces of the same spacer, then flip one to have the mirrored version you need for the other side of the frame.

The RÖDALM’s backing board is made out of cardboard, which makes it very easy to cut with scissors or a hobby knife. As you can see in this picture, I didn’t particularly care about how this side looks, as nobody will ever see it but me. A few rough snips and it was good enough. I want to ensure we can still easily access both the buttons on the top of the device and the USB-C charging port on the left once the display is assembled. I’m not as worried about reaching the micro-SD card slot or the expansion ports on the E1002 – they are not used in this build. While cutting the cardboard, do ensure that you don’t remove the areas where the small metal tabs of the RÖDALM frame hold the backing board in place. You only have 4 tabs, and the E1002 is a bit heavier than the normal frame contents, so you want all of them to work.
Installation instructions
The YAML configuration for this build can be found on my GitHub. I’ll keep this configuration updated as I keep playing around with it, so it’s worth keeping an eye out for updates and any improvements I may think of over time.
There are many tutorials on how to use ESPHome and how to install your configuration to an ESP-based device, including one from Seeed Studios specifically for the E1002, so I won’t go over that here. Instead, I assume you understand how to use the ESPHome Device Builder and how to install the generated firmware to the E1002. There are instruction inside of the YAML file, but we’ll go over the steps here as well:
Preparations
- At the top of my YAML configuration is a set of substitutions, which allow you to easily configure the device without having to dig into the rest of the code. You must edit these before installing onto your E1002. Start off by setting substitutions for all names, keys, passwords, and other standard settings.
- Set substitution
ha_www_urlto the publicly accessible URL of yourwwwfolder, with a trailing slash. The default URLhttp://homeassistant.local:8123/local/should work for most people. - For organization purposes, you may want to store the images you will display in a subfolder. To do so, set substitution
album_folderto the name of this folder and add a trailing slash. By default this is set toreterminal/but you can change it to""if no subfolder is used. - Set substitution
max_imagesto the maximum amount of images you want to use without having to update this configuration again. This setting is really just a formality, and the1000it is set to by default should be fine for the foreseeable future for most people. But hey, go wild. - Set substitution
rotationto0if you want to use the device in landscape (horizontal) mode, or to270if you want to use it in portrait (vertical) mode. These settings match the orientation of the IKEA RÖDALM’s easel hinge and sawtooth picture hangers. You can also use90or180, of course, but the result will be ‘upside down’ for this IKEA frame. - Create a helper input boolean in Home Assistant that will control whether this frame is allowed to go into deep sleep. Set substitution
ha_deep_sleepto this helper’s entity name. My entity, just as an example, is namedinput_boolean.reterminal_deep_sleep. - Set substitution
deep_sleep_runto the amount of time the frame should stay awake. By default this is set to 90 seconds, which is enough time to boot, connect to Wi-Fi, download a random image, and refresh the epaper panel before going back to sleep. - Set substitution
deep_sleep_durationto the amount of time the frame should stay asleep. By default this is set to 6 hours, so the frame refreshes 4 times each day. Depending on your use-case, you can change it to whatever you want. During testing, I set this to 24 hours to have the frame only update once every night. But also to 1 hour so I’d have the frame update several times a day. This is the setting that will primarily affect the device’s battery life.
Upload images

This build expects you to have a (sub)folder on your Home Assistant’s publicly accessible www folder that contains the images that you wish to display on the device. You can find this www folder in your Home Assistant’s config folder. If you do not yet have a www folder, follow the instructions to create one.
Uploaded your PNG files to the (sub)folder you set in the substitution in the first steps. The files should be numbered sequentially, starting at 1.png, followed by 2.png, etc. This configuration assumes a set of sequentially ascending numbered files, with no gaps.
To prepare images for use on this display, ensure they are:
- In PNG format.
- In 800 x 480 (landscape) or 480 x 800 (portrait) pixel resolution.
- Dithered to the 6 color palette of the Spectra 6 panel. It’s easiest to use the EPDOptimize tool to do so.
Take note of the total amount of images you have uploaded to this (sub)folder, as you’ll need that number in the next steps.
Installation
- In Home Assistant, set your deep sleep helper input boolean to Off, so the E1002 won’t automatically go to sleep. This way, you can set up the display after installation.
- Go to the ESPHome Device Builder interface and install your configuration onto your E1002.
- Once installed, Home Assistant will automatically discover the E1002 as an ESPHome device. Add the display to Home Assistant after it has been discovered.
- Go to ESPHome in your Settings > Devices & Services screen. Click on the entry for your E1002 and in its ESPHome settings, turn on the option “Allow the device to perform Home Assistant actions.” This is not strictly necessary, but makes it possible to control the deep sleep helper from the device settings.
- In Home Assistant, set the
Total Imagesnumber of this ESPHome device to the highest numbered image you have uploaded.
Usage
- Set your deep sleep helper input boolean to On, so the E1002 with automatically go through deep sleep cycles as you configured in the substitutions. Every time it wakes, it will load a random image.
- To ensure you don’t have to go to the Helpers view in Home Assistant’s settings every time, the deep sleep helper is also exposed as a switch in the display’s ESPHome settings named
Deep Sleep Toggle. If you did not turn on the setting “Allow the device to perform Home Assistant actions” this switch will not function. - While the device is sleeping, you can not change any of its settings. It’s easiest to first turn Off the deep sleep helper input boolean, and then press the green button on the E1002. This wakes the device, and won’t let it go back to sleep, giving you time to change settings as desired. Turn On the deep sleep helper input boolean once you’re done changing settings.
- If you upload additional (sequentially-numbered) images to the (sub)folder, you have to update
Total Images. While the device is awake, set theTotal Imagesnumber to the highest numbered image you have uploaded.
Controls
While the device is awake, you can do the following:
- Set the
Current Imagenumber of this device in Home Assistant to go to that specific numbered image. - Turn on the
Audio Feedbacktoggle in the device’s settings to get buzzer sounds when using the next, previous, or random image controls.
Future Improvements
While this build is perfectly usable right now, there are still some improvements that I have in mind for it:

- The mat that comes with the IKEA RÖDALM is slightly smaller than the full display of the Seeed E1002. We’re talking about millimeters on each side, so it is not particularly problematic, unless you’re a purist and want every pixel visible. But some googling has told me that there are online services that can make custom mats on order to your exact specifications, and I intend to order one just to see what is possible.
- A new mat will reveal the next issue with my build: the E1002’s epaper panel is not perfectly centered inside the frame. The mat currently hides this offset, but the device is about 2 millimeters lower than center. I want to modify my 3D-printed spacer model to account for this and move the frame to the perfect centered location.
- Last but not least, the way images are handled in my ESPHome config is pretty janky, and while it looks fine in use, it’s far from elegant. I would love to integrate this frame with Home Assistant’s media browser. It would be great if we can manage media from Home Assistant itself, removing the need to put our images inside Home Assistant’s public folder. It would be even better if we could send any image from the media browser to the E1002, and have them resized and dithered automatically, without needing to manually prepare them.
What do you think?
Have any suggestions for my build? Let me know, either here in the comments, on GitHub, or on social – I’d love to hear your thoughts!